TIA Portal First Project: Step-by-Step Video Walkthrough
The short answer
Your first TIA Portal project takes six steps: create the project in the Portal view, add a CPU by its exact article number and firmware (for example a CPU 1214C DC/DC/DC), set the PROFINET IP address, add any I/O modules, write a rung in Main [OB1] with named tags, then compile hardware and software until you see 0 errors. Archive it as a single file and you have something you can open on any PC with the same TIA Portal version.
Watch the lesson
The video above is Siemens TIA Portal: how to create project and first program TUTORIAL by ControlByte Automation, embedded with thanks. EDWartens is not affiliated with the creator. It is about 11 minutes long and sits in the "Your First Project and Hardware Configuration" module of our free Siemens TIA Portal in Three Hours course.
First, the lesson creates a new project from the Portal view. Next it adds a CPU and moves into the Project view and the device configuration. Then it opens the main program block, writes a first ladder network and compiles it. Watch it once end to end, then build the project yourself using the written steps below, which add the checks the video moves through quickly.
What you need before you start
- TIA Portal STEP 7 Basic or Professional. Siemens offers a time-limited trial licence that is enough for this exercise. Any recent version works; the menus below have been stable for several releases.
- PLCSIM if you have no hardware. It installs alongside TIA Portal and simulates an S7-1200 or S7-1500.
- A target CPU. If you are following a course or own a trainer, use its exact article number. If not, pick the CPU 1214C DC/DC/DC: it is the most common S7-1200 in Indian training labs and panels.
The walkthrough
1. Create the project
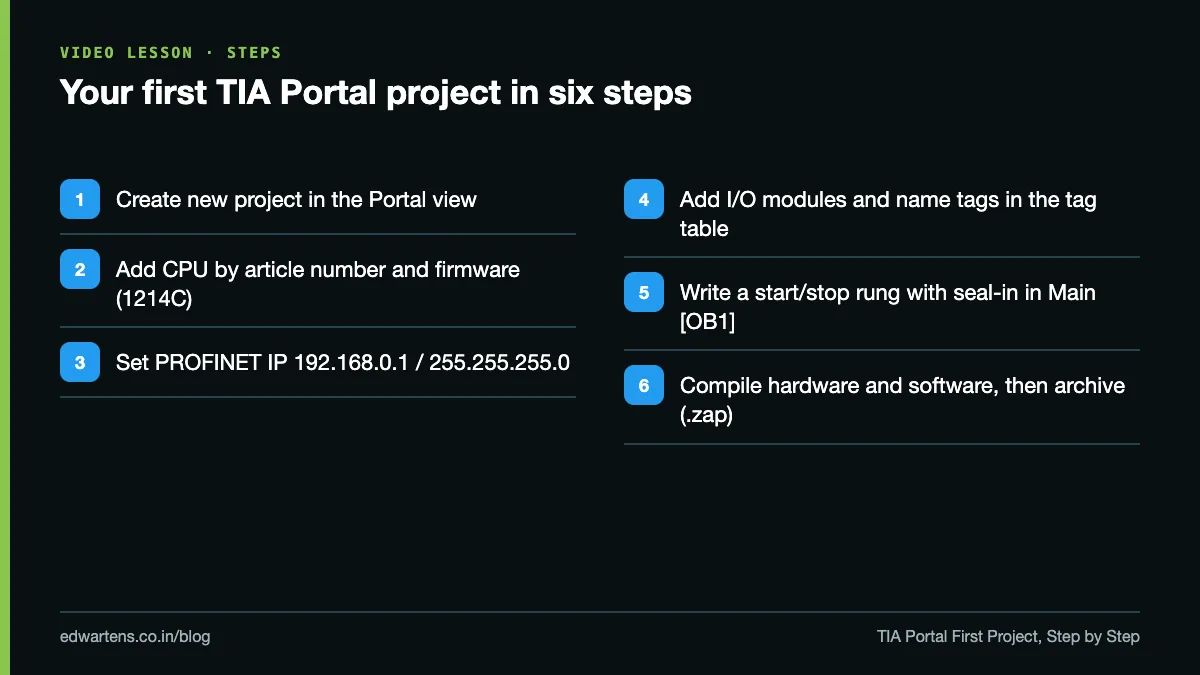
Open TIA Portal. In the Portal view choose Create new project, give it a name without spaces at the end (for example Conveyor_01), choose a folder you back up, and click Create. TIA Portal makes a folder with that name holding the whole project.
2. Add the CPU
Click Configure a device, then Add new device, then Controllers, SIMATIC S7-1200, CPU. Open the 1214C DC/DC/DC folder and pick the article number printed on the front of your CPU (for example 6ES7 214-1AG40-0XB0). In the Version box choose the firmware your CPU actually runs. The project firmware may be equal to or lower than the hardware, never higher; if it is higher, the download is refused.
If you do not know the article number, choose Unspecified CPU 1200. Later, when online, TIA Portal can detect the real hardware and fill it in.
Click Add and TIA Portal switches to the Project view with the Device view open. This is where you will spend almost all your time.
3. Set the IP address
Click the green PROFINET port on the CPU picture. In the Inspector window below, open Properties, General, PROFINET interface, Ethernet addresses. Set the IP address to 192.168.0.1 and the subnet mask to 255.255.255.0. Your laptop's Ethernet adapter must be in the same subnet with a different address, for example 192.168.0.10.
4. Add I/O modules (optional)
The 1214C already has 14 digital inputs and 10 digital outputs on board. To add more, drag a module from the Hardware catalog on the right (for example an SM 1221 digital input module) into slot 2 beside the CPU. Note the addresses TIA Portal gives it in the Device overview; they appear in the I and Q columns.
5. Name your tags
Open PLC tags, Default tag table and enter:
| Name | Data type | Address | Comment |
|---|---|---|---|
| Start_PB | Bool | %I0.0 | Green start button, NO |
| Stop_PB | Bool | %I0.1 | Red stop button, wired NC |
| Motor_Run | Bool | %Q0.0 | Motor contactor coil |
Name tags before you write logic. A rung of %I0.0 and %Q0.0 is unreadable to the next engineer, and to you in three months.
6. Write the first rung in OB1
Open Program blocks, Main [OB1]. Network 1 is empty. Build a start/stop rung with a seal-in:
- A normally open contact on Start_PB.
- A parallel branch around it with a normally open contact on Motor_Run (the seal-in).
- In series after the branch, a normally open contact on Stop_PB.
- A coil on Motor_Run at the end.
Why a normally open contact for the stop? Because the real stop button is wired normally closed, so its input bit is 1 when the button is healthy and not pressed. The contact passes power while the bit is 1 and breaks it when someone presses stop or the wire is cut. This is the fail-safe arrangement covered in detail in our post on the seal-in circuit. In PLCSIM you must set I0.1 to 1 to simulate the healthy stop button, or the motor will never start.
7. Compile
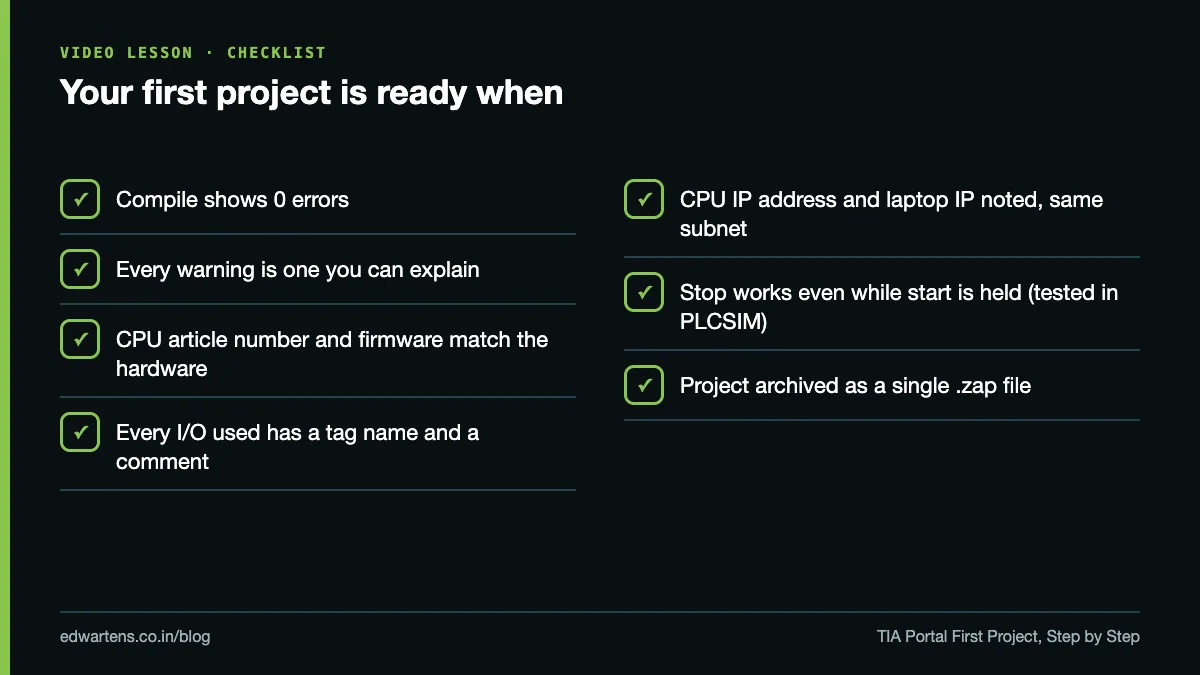
Right-click the PLC in the project tree and choose Compile, Hardware and software (only changes). For a first build, Hardware (rebuild all) followed by Software (rebuild all) is cleaner. Read the Info tab at the bottom. You want 0 errors. Warnings are allowed only if you can explain each one.
8. Download or simulate
With hardware: Online, Download to device, choose PN/IE as the interface type and your laptop's Ethernet adapter, then Start search. Select the CPU, load, and put it in RUN when asked. Without hardware: select the PLC and choose Online, Simulation, Start; PLCSIM opens and the same download dialog appears.
Go online (the glasses icon), open OB1 and toggle the inputs. The green highlighting shows which contacts pass power.
9. Archive
Project, Archive saves the whole project as one compressed file. The extension includes the version number (for example .zap17 for V17). Email or share this file, not the project folder.
What "done" looks like at each step
| Step | Where in TIA Portal | Done when |
|---|---|---|
| New project | Portal view, Create new project | Project folder exists |
| Add CPU | Add new device, Controllers | Article number and firmware match the hardware |
| IP address | Device view, PROFINET interface | 192.168.0.1 / 255.255.255.0, laptop in same subnet |
| Tags | PLC tags, Default tag table | Every I/O used has a name and comment |
| OB1 rung | Program blocks, Main [OB1] | Start, seal-in, stop and coil in one network |
| Compile | Right-click PLC, Compile | 0 errors in the Info tab |
| Archive | Project, Archive | One .zap file saved |
Common mistakes
- Firmware higher than the CPU. The download fails with a version mismatch. Change the device version in the Device view to match the hardware.
- Picking a CPU by name, not by article number. There are several 1214C variants (DC/DC/DC, AC/DC/RLY, DC/DC/RLY). The outputs differ, and so does the wiring.
- IP clash or wrong subnet. If the laptop is on 192.168.1.x and the CPU on 192.168.0.1, the search finds nothing. Fix the laptop's adapter, not the CPU.
- Compiling software only. Hardware errors, such as an address conflict, stay hidden until download. Compile hardware too.
- No tag names. It compiles, but nobody can read it. Name every tag from day one.
- Stop button as a normally closed contact in logic with an NC button in the field. That is a double negative: the motor runs only while stop is pressed. Use a normally open contact for an NC-wired stop.
Practice task
Create a project with a CPU 1214C DC/DC/DC at 192.168.0.1/24, add one digital input module and one digital output module, write the start/stop rung above with named tags, and compile with 0 errors. Archive it as a single .zap file. If you have PLCSIM, download it and prove that pressing stop (setting I0.1 to 0) drops Motor_Run even while start is held.
Learn it free
The free Siemens TIA Portal in Three Hours course continues from here into addressing, PLCSIM and contacts and coils, with notes and a practice task for each module. For the full path, take the free Siemens TIA Portal course, and when your programs grow, the PLC scan cycle explains why rung order matters. For a structured study plan, see learn Siemens TIA Portal free in six weeks. The video lessons are by independent creators; EDWartens wrote the notes, practice and assessments.
Frequently asked questions
Q: Can I learn TIA Portal without a real PLC?
A: Yes. PLCSIM simulates an S7-1200 or S7-1500 and accepts the same download as real hardware, so you can build and test this whole project on a laptop.
Q: Which CPU should I choose for my first TIA Portal project?
A: Use the exact article number of the CPU you will download to. If you have no hardware, the CPU 1214C DC/DC/DC is a sensible default because it is common in Indian labs and panels.
Q: Why does my download fail with a version error?
A: The firmware version chosen in the project is higher than the CPU's real firmware. Change the device version in the Device view to match the hardware and compile again.
Q: What is a .zap file in TIA Portal?
A: It is a compressed archive of the whole project, created with Project, Archive. The number in the extension shows the TIA Portal version that made it.
Q: Why is the stop button a normally open contact in my ladder?
A: The physical stop button is wired normally closed, so its input bit is 1 when healthy. A normally open contact passes power while that bit is 1 and opens when stop is pressed or the wire breaks.
Learn this, free
The courses that teach this
Every lesson, the written notes and the practice are free with an account. Only the certificate is optional and paid.